home / skills / openclaw / skills / ui-test
/skills/clawd21/ui-test
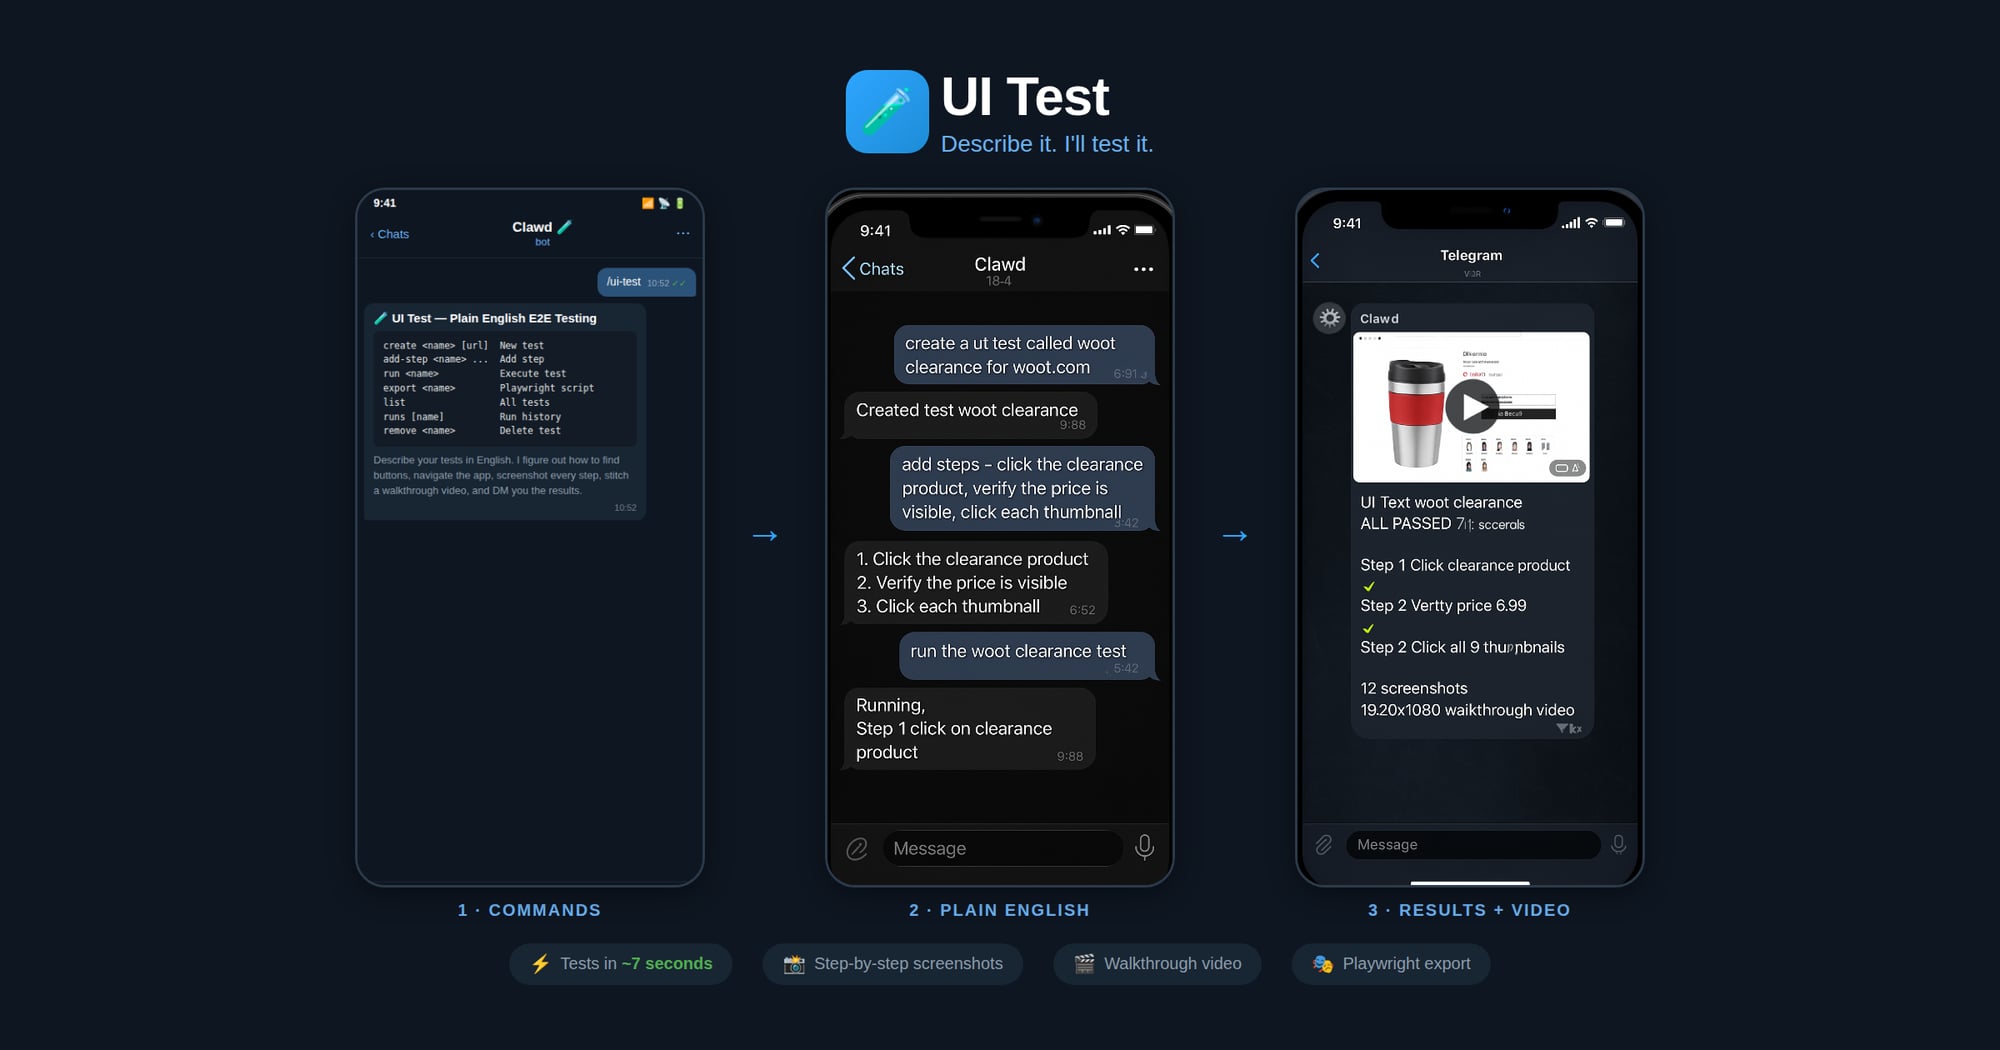
This skill lets you describe UI tests in plain English and exports Playwright scripts for CI/CD.
npx playbooks add skill openclaw/skills --skill ui-testReview the files below or copy the command above to add this skill to your agents.
---
name: ui-test
description: Plain English E2E UI testing. Describe tests in natural language, agent executes via browser tool, then exports real Playwright test scripts for CI/CD. Use when asked to create UI tests, test a website, or generate Playwright scripts.
metadata: {"clawdbot":{"emoji":"🧪"}}
---
# UI Test — Plain English E2E Testing (🧪)
Describe your UI tests in plain English. The agent figures out how to find buttons, navigate the app flow, and execute each step — no selectors or code needed. It screenshots every major step, stitches them into a walkthrough video, and DMs you the result with a pass/fail report.
*Made in 🤠 Texas ❤️ [PlebLab](https://pleblab.dev)*
## Workflow
1. **Create** — User names a test and describes steps in plain English
2. **Run** — Agent opens the clawd browser, executes each step, screenshots each action
3. **Export** — Agent generates a Playwright `.spec.ts` from the verified steps
4. **CI/CD** — User drops the script into their test suite, runs with `npx playwright test`
## Agent Execution Flow
When running a test:
1. Load test definition: `node scripts/ui-test.js get "<name>"`
2. Start clawd browser: `browser action=start profile=clawd`
3. Navigate to the test URL
4. For each plain English step:
a. Interpret what the user means (click, type, assert, wait, etc.)
b. Use `browser action=snapshot` to see the page
c. Use `browser action=act` with the appropriate request (click/type/press/etc.)
d. Take a screenshot after each step
e. Record what selector/ref was used and whether it passed
5. Save run results: `node scripts/ui-test.js save-run "<name>" passed=true/false`
6. Report results to user with pass/fail per step
When exporting to Playwright:
1. Load the test definition and most recent successful run
2. Map each plain English step to Playwright API calls based on what worked during execution
3. Generate a `.spec.ts` file with proper imports, test structure, and assertions
4. Save to the user's project or a specified output path
## Step Interpretation Guide
The agent should interpret plain English steps like:
| User says | Browser action | Playwright equivalent |
|-----------|---------------|----------------------|
| "click the Sign In button" | `act: click ref="Sign In button"` | `page.getByRole('button', {name: 'Sign In'}).click()` |
| "type [email protected] in the email field" | `act: type ref="email" text="[email protected]"` | `page.getByLabel('Email').fill('[email protected]')` |
| "verify the dashboard shows Welcome" | `snapshot` + check text | `expect(page.getByText('Welcome')).toBeVisible()` |
| "wait for the page to load" | `act: wait` | `page.waitForLoadState('networkidle')` |
| "click the hamburger menu" | `act: click` (find menu icon) | `page.getByRole('button', {name: 'menu'}).click()` |
| "scroll down" | `act: evaluate fn="window.scrollBy(0,500)"` | `page.evaluate(() => window.scrollBy(0, 500))` |
| "check the Remember Me checkbox" | `act: click ref="Remember Me"` | `page.getByLabel('Remember Me').check()` |
| "select 'USD' from the currency dropdown" | `act: select values=["USD"]` | `page.getByLabel('Currency').selectOption('USD')` |
| "take a screenshot" | `browser action=screenshot` | `page.screenshot({path: 'step-N.png'})` |
| "verify URL contains /dashboard" | check current URL | `expect(page).toHaveURL(/dashboard/)` |
## Commands
Run via: `node ~/workspace/skills/ui-test/scripts/ui-test.js <command>`
| Command | Description |
|---------|-------------|
| `create <name> [url]` | Create a new test |
| `add-step <name> <step>` | Add a plain English step |
| `set-steps <name> <json>` | Replace all steps |
| `set-url <name> <url>` | Set the test URL |
| `get <name>` | Show test definition |
| `list` | List all tests |
| `remove <name>` | Delete a test |
| `save-run <name> ...` | Save execution results |
| `runs [name]` | Show run history |
| `export <name> [outfile]` | Export as Playwright script |
## Export Format
Generated Playwright files include:
- Proper TypeScript imports
- `test.describe` block with test name
- `test.beforeEach` with navigation to base URL
- Each step as a sequential action with comments showing the original English
- Assertions where the user said "verify", "check", "should", "expect"
- Screenshots on failure
## Screenshots & Video
During test execution, the agent should:
1. **Before each step**: take a screenshot → save as `step-NN-before.jpg`
2. **After each step**: take a screenshot → save as `step-NN-after.jpg`
3. **On failure**: take a screenshot → save as `step-NN-FAIL.jpg`
Screenshots are saved to: `~/.ui-tests/runs/<slug>-<timestamp>/`
After the run completes, generate a walkthrough video:
```bash
ffmpeg -framerate 1 -pattern_type glob -i '~/.ui-tests/runs/<folder>/step-*.jpg' \
-vf "scale=1280:-2" -c:v libx264 -pix_fmt yuv420p -y output.mp4
```
Then send the video to the chat.
## Storage
- Test definitions: `~/.ui-tests/<slug>.json`
- Run history: `~/.ui-tests/runs/<slug>-<timestamp>/run.json`
- Screenshots: `~/.ui-tests/runs/<slug>-<timestamp>/step-*.jpg`
- Video: `~/.ui-tests/runs/<slug>-<timestamp>/walkthrough.mp4`
- Exported scripts: user-specified path or `./tests/<slug>.spec.ts`
This skill provides plain-English end-to-end UI testing. Describe test steps in natural language, the agent runs them in a headless browser, captures screenshots and a walkthrough video, and exports verified Playwright .spec.ts files ready for CI/CD integration.
You create a named test with plain-English steps and a target URL. The agent opens a browser, interprets each step (click, type, assert, wait, etc.), performs actions, snapshots before and after each step, and records whether each step passed. After a successful run the skill maps the executed actions to Playwright API calls and generates a ready-to-run TypeScript test file for your project.
How are selectors chosen when I only describe steps?
The agent snapshots the page and uses visible roles, labels, and text to find the best match; it records the selector used so the exported Playwright step mirrors what worked during the run.
What artifacts do I get after a run?
You receive before/after screenshots for each step, a walkthrough video stitched from screenshots, a pass/fail report per step, and an optional exported Playwright .spec.ts file.